Showing posts with label Blogger Tips. Show all posts

Tuesday, October 16, 2012

Recommended For You Widget Blogger Slide Out Popup Box

Recommended for you slide out is very famous tool. It is used in all popular websites. It is very useful in increasing traffic. It popups when some after reading the post, article or content in a website and scrolls down. This popup is shown. It is used in most of the major sites. It helps a lot increasing the traffic and ranking of the page.

Recommended for you is now available for blogger. It will help bloggers to have there visitors in there blog by reading more similar blogs like they have read before on that page. This recommended for you slide out is also used by mashable for increasing there traffic and page ranking. It is a must have widget for bloggers. It is very seo friendly.


As we can see in the above screenshot the recommended for you widget for blogger. It is shown at the right bottom of the blogger blog page. And it popups up when someone has finished reading a blogger blog post. The post link shown in the recommended for you slide out will be similar post to the post were the visitor is.

The Recommended for you slide out blogger widget includes sharing buttons. Which can be used for share the blogger blog post on twitter, facebook, etc..

How To Setup Recommended For You Slide Out Widget For Blogger

You must registers an account at http://simplereach.com/?login=true and then fill up the form. After the signup you must verify the account by clicking on the click which is mailed to you. now by going to simplereach.com and following the instruction you can setup the recommended for you slide out for blogger widget.


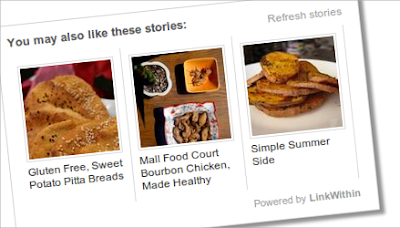
Related Posts Widget For Blogger Working - Bug Fixed

Related post widget is a easy way to get traffic and also page ranking. It will interlink all the pages of your blogger blog and you will be able get lots dofollow links to your pages from different pages. This related post widget not only lets you to build PR it also increases your site traffic.


Related post widget can be added easily. you only need to follow the below steps carefully to get related post widget working for blogger.

You can create self hosted related post widget. but it will take time to load. so here we are taking linkwithin related post widget for easily adding related post widget for you blogger template for easy navigation.

How To Add Related Post Widget To Blogger

  • Go to http://www.linkwithin.com/learn
  • Fill up the form and click get widget
  • Now click on the "install widget" link and select the blogger in which you want the related post widget
  • Then save the widget
You have successfully added the related post widget to your blogger blog. It will help you in increase traffic and page rank for sure.

Twitter Flying Bird For Blogger Page & Other Website

Here we are posting flying twitter bird. This flying twitter bird will fly when you move the mouse cursors or scroll the page. This is the best way to increase twitter followers.

This twitter bird will not only get you followers it will also tweet the page which the visitor is in and liking to click on the bird.

It is very easy to add this flying twitter bird to you blogger page or website. You just need to follow the below steps carefully to add the flying twitter bird.


How to Add Flying Twitter Bird To Blogger

  • Go to blogger and backup your template
  • Go to html template edit
  • Search for </body>
  • Paste the below code given just before the </body> (close body tag)

Code To Add Flying Twitter Brid In Blogger

<script src='http://dl.dropbox.com/u/85876997/File%20Hosting/Blogging%20Fear/Flying%20Twitter%20Bird%20%5BPost%5D/twitter-flying-bird.js' type='text/javascript'> 
</script> 
<script type='text/javascript'> 
var twitterAccount = &quot;username&quot;; 
var tweetThisText = &quot; <data:blog.pageTitle/> : <data:blog.url/> &quot;; 
tripleflapInit(); 
</script>

Replace the username with your real twitter username. Now save the the template and check the flying twitter bird on your blogger page.

Flying Twitter Bird For Websites

Here there is no difference in the code you just need to go to the page in which you want the flying twitter bird and paste the above code just before the closing body tag and then save page.

Sunday, January 15, 2012

List of Top 10 Blog Directories for Blogger

Get Free Traffic from Blog DDirectories. Top 10 Blog  directories Increase your Traffic using blog directories

Many of these directories asks you to register before submitting blogs.
There are so many hundreds of blog directories,here is the list of very good popular directories which will send you maximum traffic.
List of Top 10 Blog Directories


  1. Technorati
  2. Topblogarea
  3. Blogtoplist
  4. Fuelmyblog
  5. BlogCatalog
  6. BloggingFusion
  7. Blogarama
  8. Topbloglists
  9. Blogroll.net
  10. Myblogdirectory

How to Add Meta Tags in Blogger & Websites to Increase Traffic Page Ranking.

Adding Meta Tag in Blogger Increasing Page Ranking hacking For Page Ranking Meta Tag From More Traffic


For Blogger
  • Log into Blogger
  • Then click on "Edit HTML" link.
  • Save the Templae
  • Add to Following Meta Tag and fill it with your Details and Save
<meta content='DESCRIPTION HERE' name='description'/>
<meta content='KEYWORDS HERE' name='keywords'/>
<meta content='AUTHOR NAME HERE' name='author'/>

  • Save the Template.

For WebSites 

    • Open the your HTML page and Add the Following Tags
    <meta content='DESCRIPTION HERE' name='description'/>
    <meta content='KEYWORDS HERE' name='keywords'/>
    <meta content='AUTHOR NAME HERE' name='author'/>

    •  Save the Page

    How to Show Post Title Before Blog Title in Blogger Increase Traffic Hacking

    Hacking Traffic in Blogger Showing Post Title Before Blog Title Increase Traffic in Blogger SEO Increase Trick. Blogger Hacking Show Post PAge Title Before Page title


    • Log into Blogger
    • Then click on "Edit HTML" link.
    • Save the Templae
    • Search for the following text in the template
    <title><data:blog.pageTitle/></title>
    • Replace it with the below given code
    <b:if cond='data:blog.pageType == &quot;item&quot;'>
        <title><data:blog.pageName/> | <data:blog.title/></title>
    <b:else/>
        <title><data:blog.pageTitle/></title>
    </b:if>

    • Code Hacking Done.... 


    How to Add Read More to Blogger with Image Hacking [Read More + Thumbnail]

    Read More Hacking Using Read More Code Script. How to Add Read More trick in Blogger. Adding Read More Option in Blogger. Blogger Readmore Hacking
    Read More Hack for Blogger


    • Open Blogger
    • Go To "Templates" in Menu Tab
    • Select "Edit HTML" in Sub Menu
    • Check Expand Widget
    • Search for "</head>" Tag
    • Paste the below given code just before the Head closing tag
    <script type='text/javascript'>var thumbnail_mode = "no-float" ;
    summary_noimg = 430;
    summary_img = 340;
    img_thumb_height = 100;
    img_thumb_width = 120;
    </script>
    <script type='text/javascript'>
    //<![CDATA[
    function removeHtmlTag(strx,chop){
    if(strx.indexOf("<")!=-1)
    {
    var s = strx.split("<");
    for(var i=0;i<s.length;i++){
    if(s[i].indexOf(">")!=-1){
    s[i] = s[i].substring(s[i].indexOf(">")+1,s[i].length);
    }
    }
    strx = s.join("");
    }
    chop = (chop < strx.length-1) ? chop : strx.length-2;
    while(strx.charAt(chop-1)!=' ' && strx.indexOf(' ',chop)!=-1) chop++;
    strx = strx.substring(0,chop-1);
    return strx+'...';
    }


    function createSummaryAndThumb(pID){
    var div = document.getElementById(pID);
    var imgtag = "";
    var img = div.getElementsByTagName("img");
    var summ = summary_noimg;
    if(img.length>=1) { 
    imgtag = '<span style="float:left; padding:0px 10px 5px 0px;"><img src="'+img[0].src+'" width="'+img_thumb_width+'px" height="'+img_thumb_height+'px"/></span>';
    summ = summary_img;
    }


    var summary = imgtag + '<div>' + removeHtmlTag(div.innerHTML,summ) + '</div>';
    div.innerHTML = summary;
    }


    //]]>
    </script>

    • Now Search for  <data:post.body/>  and replace it with te below given code
    <b:if cond='data:blog.pageType == &quot;static_page&quot;'><br/>
    <data:post.body/>
    <b:else/>

    <b:if cond='data:blog.pageType != "item"'>

    <div expr:id='"summary" + data:post.id'><data:post.body/></div>
    <script type='text/javascript'>createSummaryAndThumb("summary<data:post.id/>");
    </script> <span class='rmlink' style='float:right;padding-top:20px;'><a expr:href='data:post.url'> read more "<data:post.title/>"</a></span>

    </b:if>
    <b:if cond='data:blog.pageType == "item"'><data:post.body/></b:if>
    </b:if>

    • Save the Template. Hacking done..

    How to Remove Navbar in Blogger [Blogspot Hacking]

    How to Remove Navbar in Blogger. Hide Navbar in Blogger. Simple Newbie Tutorial. Easily Remove Navbar from Blogger.


    In Blogger The official template posses navbar. Navbar is shown at the top of the blogger. It is simple to Remove navbar.


    • Open Blogger
    • Go To "Templates" in Menu Tab
    • Select "Edit HTML" in Sub Menu
    • Search for "<head>" Tag
    • Add the below given tag after the head tag
    #navbar {
    height: 0px;
    visibility: hidden;
    display: none;
    }

    • Thats it. Navbar Hacking Done..... 
    Find us on Google+
    Bloggers.com